
If you have ever thought that dairy-free ice cream was a compromise, get ready to discover a game-changer with this Creamy Dairy-Free Ice Cream (4 Flavors!) Recipe. Made with luscious coconut milk and a handful of simple, wholesome ingredients, this recipe delivers rich, velvety texture and vibrant flavors without any dairy. Whether you are vegan, lactose intolerant, or just in the mood for a refreshing treat, this recipe is bound to become one of your favorites. Ready to whip up a batch of dreamy, guilt-free ice cream that’s satisfying in every spoonful?
Ingredients You'll Need
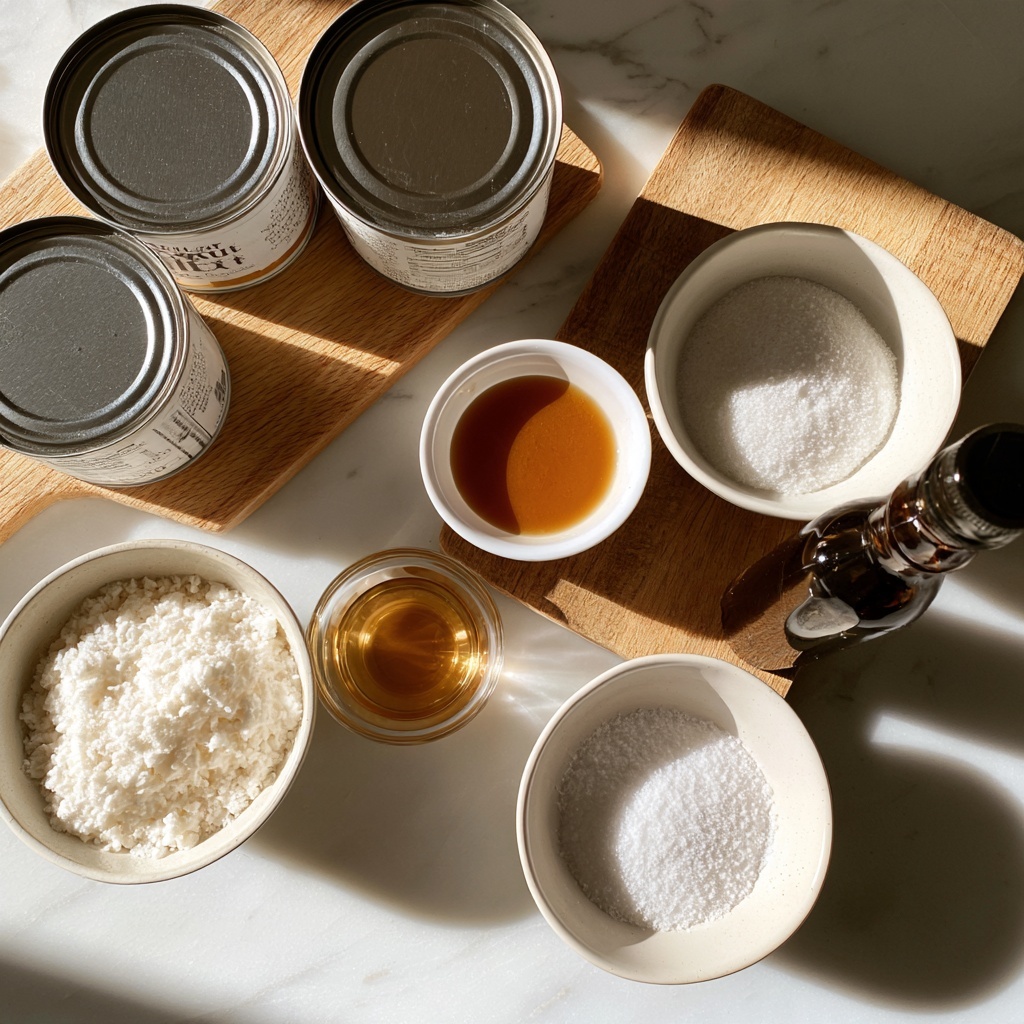
The magic of this recipe lies in its simplicity and quality ingredients. Each element plays an essential role in creating that perfectly creamy texture and balanced sweetness, while also allowing the coconut’s natural richness to shine through.
- Full-fat coconut milk (2 cans): Provides the creamy, lush base with natural fat that mimics traditional dairy cream beautifully.
- Sugar (¾ cup): Sweetens the ice cream while helping maintain a smooth texture during freezing.
- Agave nectar (¼ cup): Adds a mild, natural sweetness and helps keep the ice cream soft and scoopable.
- Coconut oil (2 tablespoon + 2 tsp): Enhances richness and helps create a silky mouthfeel that feels indulgent.
- Vanilla extract (2 tsp): Infuses a warm, classic flavor that complements all four ice cream varieties.
- Fine sea salt (¼ tsp): Balances sweetness and accentuates the flavors for a more complex taste.
How to Make Creamy Dairy-Free Ice Cream (4 Flavors!) Recipe

Step 1: Combine the Base
Gather your ingredients and pour both cans of full-fat coconut milk into a medium saucepan over medium heat. Add sugar, agave nectar, coconut oil, vanilla extract, and a pinch of sea salt. Whisk everything gently but continuously. The goal is to warm the mixture until you start seeing wisps of steam, not boiling, which usually takes about 3 to 5 minutes. This slow warming helps dissolve the sugar fully and meld all flavors together beautifully. Once ready, remove the pan from the heat.
Step 2: Blend the Base
Pour the warm mixture into a blender and secure the lid. Blend on medium speed for about 15 seconds—just enough to combine everything into a smooth, creamy liquid. If you prefer, an immersion blender works just as well and lets you blend right in the pot. This step ensures there are no grainy bits and the texture feels silky before chilling.
Step 3: Chill the Base
Next, transfer your ice cream base into a container and refrigerate for at least four hours, though overnight chilling is best for flavor development and ideal texture. Aim for a temperature around 45°F before you churn. Sometimes the mixture may separate slightly while chilling—that’s perfectly normal! Use a whisk to bring it back together before moving on.
Step 4: Churn the Ice Cream
Pour the thoroughly chilled base into your ice cream maker and churn according to the manufacturer’s directions. The ice cream will thicken and develop a soft serve consistency at this stage, which is super inviting to taste even before freezing.
Step 5: Freeze for Perfect Scoops
To get that scoopable, firm texture, transfer your churned ice cream to an airtight, freezer-safe container. Freeze it for at least four hours. This final step sets the ice cream beautifully, making each spoonful satisfyingly creamy without the icy crunch you sometimes get with dairy-free options.
How to Serve Creamy Dairy-Free Ice Cream (4 Flavors!) Recipe
Garnishes
Enhance your ice cream experience with fun and colorful garnishes. Fresh berries, toasted coconut flakes, or chopped nuts add delightful texture contrasts and bursts of flavor. A drizzle of dairy-free chocolate sauce or a sprinkle of cinnamon can also elevate the experience for a touch of extra indulgence.
Side Dishes
This ice cream goes wonderfully with warm desserts like fruit crisps, dairy-free brownies, or even a spiced-up slice of pumpkin bread. The creamy texture paired with warm and crunchy treats makes for a perfect dessert duo that’s sure to impress any guest or satisfy your own sweet tooth.
Creative Ways to Present
For a playful presentation, serve the ice cream in colorful bowls or hollowed-out fruits like pineapple halves or coconuts, echoing the tropical notes of the coconut milk. You could even create a sundae bar with the four different flavors, allowing everyone to mix and match their favorites with an array of toppings and sauces.
Make Ahead and Storage
Storing Leftovers
If you find yourself with extra ice cream (lucky you!), store leftovers in an airtight container in the freezer to preserve freshness. Make sure to press a piece of parchment paper directly on the surface before sealing to prevent ice crystals from forming and keep that creamy texture intact.
Freezing
This ice cream freezes remarkably well thanks to the coconut milk and agave combination, which prevents excessive ice crystallization. Always let it freeze for a minimum of four hours if you want firm scoops, but it can be frozen for up to two weeks without losing quality.
Reheating
Since this is ice cream, reheating typically isn’t necessary. However, if it becomes too hard, simply place it in the refrigerator for 10 to 15 minutes before scooping, allowing it to soften naturally without losing the delicate flavors.
FAQs
Can I use almond milk instead of coconut milk?
Almond milk is much thinner and has a different fat content, so it won’t produce the same creamy texture as full-fat coconut milk. For the best results with this Creamy Dairy-Free Ice Cream (4 Flavors!) Recipe, stick to full-fat coconut milk.
Is agave nectar necessary?
Agave nectar helps keep the ice cream from freezing too hard and adds a subtle sweetness. You can substitute with maple syrup or another liquid sweetener, but this may slightly alter the texture and flavor.
How can I add different flavors for the four variations?
After making the base, divide it into four parts. Add mix-ins like cocoa powder for chocolate, mashed berries for fruity, matcha powder for a green tea version, or chopped nuts and spices for a nutty flavor. Stir them in before chilling and churning.
Can I make this recipe without an ice cream maker?
While an ice cream maker gives the best texture, you can freeze the churned base in a shallow dish and stir every 30 minutes until firm. This manual method takes longer and yields a different texture but still tastes delicious.
Is this recipe suitable for people with nut allergies?
Yes! This recipe uses coconut milk and does not contain tree nuts (unless you add nut mix-ins). However, be sure to check for cross-contamination if allergies are severe.
Final Thoughts
I cannot recommend enough how fun and rewarding it is to make this Creamy Dairy-Free Ice Cream (4 Flavors!) Recipe right at home. It’s an all-around crowd-pleaser—whether for family, friends, or satisfying your own cravings—and a charming way to enjoy ice cream without dairy. Once you try it, you’ll understand why it’s one of my absolute favorites. Happy churning and even happier tasting!
PrintCreamy Dairy-Free Ice Cream (4 Flavors!) Recipe

This creamy dairy-free ice cream recipe uses full-fat coconut milk and natural sweeteners to create a rich, smooth, and versatile ice cream base. With easy steps including heating, blending, chilling, and churning, you can make four delicious flavors of dairy-free ice cream perfect for any occasion.
- Prep Time: 10 minutes
- Cook Time: 5 minutes
- Total Time: 4 hours 15 minutes (including chilling and freezing time)
- Yield: About 1 quart (4 servings)
- Category: Dessert
- Method: Stovetop
- Cuisine: Vegan American
- Diet: Vegan
Ingredients
Base Ingredients
- 2 (13.66 fl. oz) cans full-fat coconut milk
- ¾ cup sugar (150g)
- ¼ cup agave nectar (85g)
- 2 tablespoons + 2 teaspoons coconut oil (36g)
- 2 teaspoons vanilla extract
- ¼ teaspoon fine sea salt
Instructions
- Combine the base: In a medium saucepan over medium heat, add both cans of coconut milk, sugar, agave nectar, coconut oil, vanilla extract, and salt. Whisk to combine and continue whisking occasionally until wisps of steam appear, about 3 to 5 minutes. Remove from heat.
- Blend the base: Transfer the mixture to a blender, secure the lid tightly, and blend on medium speed for 15 seconds to fully incorporate the ingredients. Alternatively, use an immersion blender for this step.
- Chill the base: Pour the ice cream base into a container and refrigerate for at least 4 hours, ideally overnight. The base should reach about 45°F before churning. If the mixture separates during chilling, whisk it to recombine before churning.
- Churn the ice cream: Pour the chilled base into an ice cream maker and churn according to the manufacturer's instructions. At this stage, the ice cream will have a soft-serve consistency.
- Freeze: Transfer the churned ice cream into a sealed, freezer-safe container. Freeze for at least 4 hours to achieve a firmer, scoopable texture before serving.
Notes
- Use full-fat coconut milk for the creamiest texture.
- Natural sweeteners like agave nectar add a nice hint of flavor and balance sweetness.
- Chilling the base thoroughly is essential for optimal churning and creaminess.
- Soft-serve consistency can be enjoyed immediately, but freezing longer firms up the texture.
- Make sure to whisk the mixture before churning if it separates during refrigeration.


Leave a Reply